
It’s almost Valentine’s Day and I haven’t decorated my home at all. I’m not big on tons of frou-frou décor anyway, but it is nice to at least recognize the holiday. So, I put together this quick project. It’s a decorative key garland. In honor of Valentine’s Day I’m thinking of it as a “key to my heart” garland. (Any other time of the year it can just be a plain ol’ key garland.) This do-it-yourself key garland is about as simple to make as it gets. Take some twine and some vintage bone keys, loop the twine through the keys, string them up and you’re done. When I think about it now, it might seem kind of strange that I just happen to have a bunch of old keys stored up waiting for me to use them in a project. You don’t have things like that just laying around your house? In that case, you can definitely scope out antique malls, thrift stores and and secondhand shops for a few of these vintage gems. They’re not too difficult to find. Would you do this five-minute project? Do you have an obsession with old keys too? I want...
Top 5 Posts of 2013

As 2013 comes to a close, I thought I’d share some of my most popular posts from the year. I really tried to step up and post more this year. And, I tried to share new tips, projects and ideas that you hadn’t seen before. I truly want Red Leaf Style to provide inspiration and excitement about decorating your home because I have so much fun with it. Here’s to an even better 2014 and a look back at what you loved in 2013: 5) Are You Stuck in a Decorating Rut? Do you ever think your home just feels boring? It’s just…the same? You want to change it up but you don’t know how? You’re in a decorating funk, my friend. I’ve been there too. You just have to get out of your usual way of doing things. Here are five ideas to pull you out of that decorating rut. 4) 15 Ways to Clean With Baking Soda Do you have a box of baking soda in your cupboard? Lucky you. That humble little box holds the ingredient to clean, refresh and deodorize your entire home—and it’s completely natural. Here are just fifteen ways to clean with baking soda....
Toilet Paper Roll Snowflake
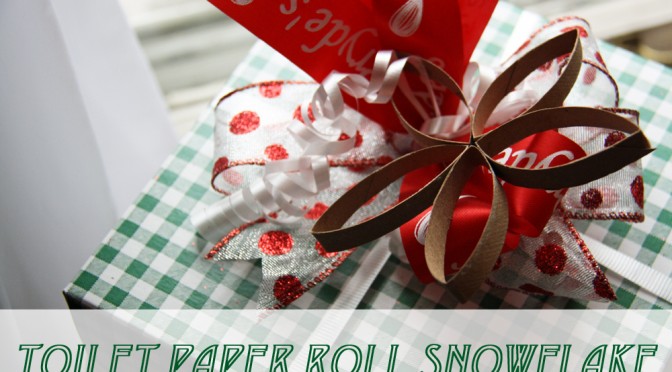
Are you wrapping some last-minute presents today? I know I still have a few to wrap. Just because it’s last minute, doesn’t mean you don’t have time to make each present special. This tutorial will show you how to make a pretty snowflake to top your presents in just minutes. Plus, it uses something we all have around the house—toilet paper rolls! Here’s how to craft your own toilet paper roll snowflake. Gather a bunch of toilet paper rolls or paper towel rolls. Flatten the roll and then cut segments at about 1/2 an inch. Keep cutting and you’ll have a bunch of petal-shaped pieces. Next, hot glue your pieces together in the shape of a snowflake. I just put a tiny dab of glue on the corner of one piece and stuck the other corner to it. Then, just go around in a circle. I used five pieces to make my snowflake, but you can use as many or as few as you like. After all, no snowflake is the same. What do you think of these toilet paper roll snowflakes? Let me know in the comments… Keep Up With Red Leaf Style! Follow Red Leaf Style author Kirsten...
DIY Christmas Tree Cones
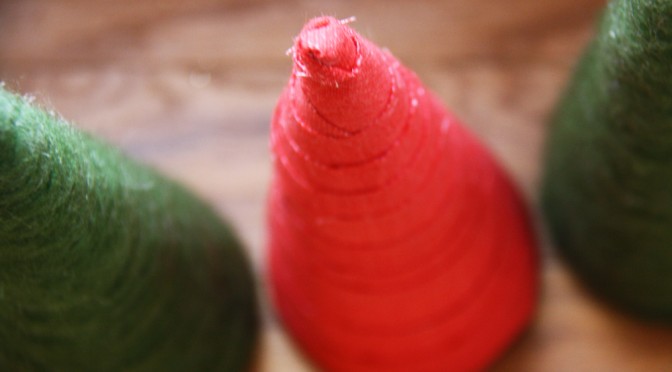
If you want to decorate your home for Christmas but don’t want to spend a bunch of money, these easy-to-make Christmas tree cones are for you. This simple craft project cost me next to nothing to make and now I have three cute Christmas trees to decorate my mantle. Making these Christmas tree cones doesn’t require a lot of supplies or effort. This project is so easy even the not-particularly-crafty folks can do it. Follow my step-by-step instructions to make your own crafty Christmas tree cones using yarn and fabric. Supplies for yarn cones: Styrofoam cones (I purchased three at Dollar Tree for $3.) Yarn (I already had some green yarn on hand.) Hot glue gun/glue sticks Thick paper Supplies for fabric cones: Styrofoam cones Fabric (I had some on hand that I purchased from an estate sale for $1.) Hot glue gun/glue sticks Thick paper Straight pins The steps for making yarn and fabric cones are similar, so I’m just going to go through them at the same time. Start with your styrofoam cones. The cones I purchased didn’t have pointy tips. I wanted them to actually resemble Christmas trees, so I had to create my own tips. To...
Reimagining Inspiration: 5 Do-It-Yourself Projects
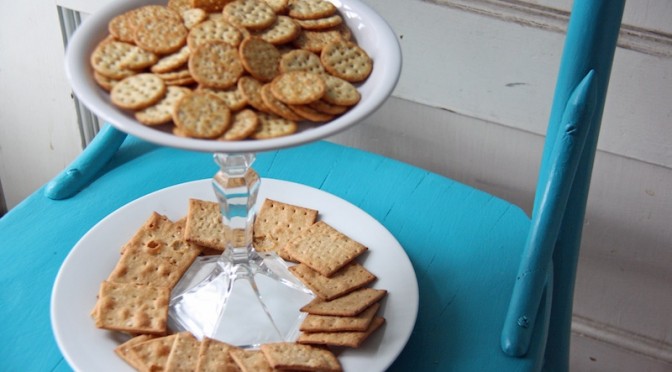
If you’ve been following my blog, you know that this month I’ve taken a 31 day blogging challenge. Meaning, I’ll be posting every day in October on one topic. After thinking about what I tend to write about on my blog anyway, I chose 31 Days of Reimagining as my topic. I get a little decorating kick out of reimagining home décor in fresh ways. I wanted to share five do-it-yourself projects from my blog where I did just that. You’ll see purchases from thrift stores, stuff bound for the trash and even items from my front yard, all reimagined in new ways. I hope they give you some reimagining inspiration for your own home. 1. Branch Jewelry Hanger Dangle your necklaces from a pretty jewelry holder crafted from a tree branch. See how to make this quirky-cute jewelry holder yourself. 2. Wine Cork Bulletin Board Turn leftover wine corks into a pretty project for your kitchen or office. Find out how to make your own wine cork bulletin board. 3. Easy Tiered Tray Create your own pretty tiered tray using just two thrift store plates and a candle stick holder. Get instructions on how to craft your own...
How to Make Beeswax Candles
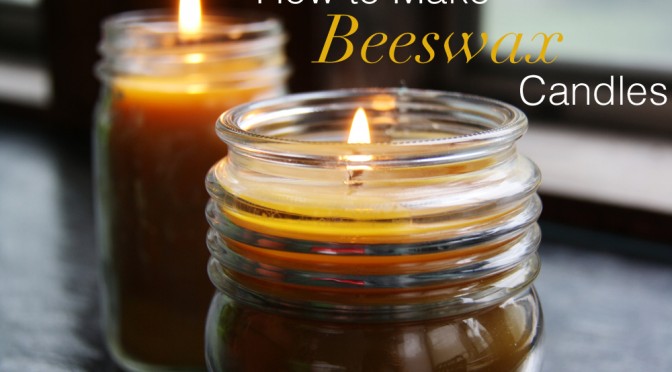
Candles just make a home feel cozy. It’s something about the soft flickering light, I think. It sets a relaxing mood. With their golden yellow color and light honey scent, beeswax candles are the cozy of the cozy. I’m slightly obsessed with them. Partly because I know that most candles you buy are made with paraffin wax, a by-product of oil refining. They also usually contain synthetic fragrances, which are also made from petroleum. Between the paraffin wax and the synthetic fragrances, many conventional candles seriously pollute your indoor air. The soot created by these candles (I know you’ve seen this black residue on your candles) is extremely toxic. It contains toluene and benzene, volatile organic compounds linked to cancer and neurological damage. Beeswax is the only naturally occurring wax on earth. And unlike candles made from paraffin wax, beeswax can actually cleanse indoor air. If that’s not enough reasons to make your own beeswax candles, just look at how cute they are! Here’s how to make your own. You’ll need beeswax, candle wicks and jars. I bought five pounds of beeswax from this seller on eBay. It came in these awesome stamped chunks. I already had the wicks from a soy...
DIY Cake Stand Jewelry Holder
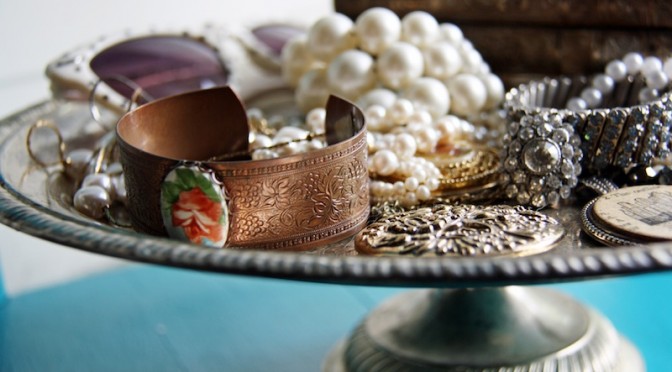
If you can’t see your jewelry, how will you remember to wear it? That’s my problem, anyway. Instead of stashing my necklaces, bracelets and earrings in jewelry boxes, I like to use clever organization to display them. When I can see everything, then I’ll actually put it on. A cake stand makes a smart (and pretty!) way to display jewelry. Plus, it repurposes an item that doesn’t see a lot of other use. (Unless you whip up a bunch of cake stand-worthy baked goods all the time.) The dish portion of the stand provides the perfect space to corral smaller jewels and the raised pedestal adds visually-appealing height to wherever you place it. Using a cake stand to display your jewelry couldn’t be easier. It’s the ultimate DIY. Simply take a cute cake stand and arrange your baubles on it. You can even dangle earrings off the edges of the dish. I like the look of my tarnished silver vintage cake stand, but any color would do. A glass cake stand would set off sparkly jewels nicely. Just use what you already have. You can’t go wrong. Have you used a cake stand to display your jewelry? Show it...