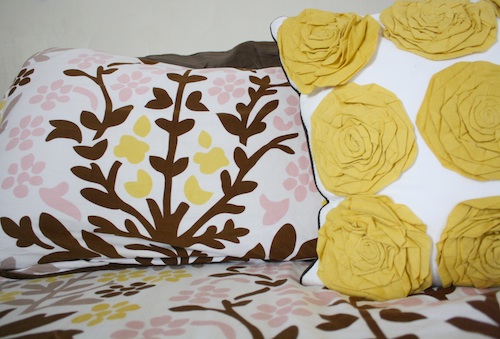
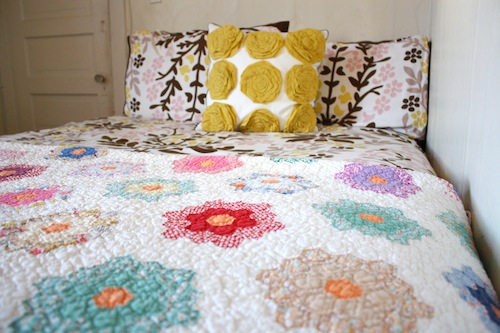
If you’re like me, it’s a struggle just to get out of that comfy bed in the morning, let alone make it. On those days when I do actually manage to put the sheets back in order, smooth out the comforter and fluff the pillows, I’m always happy that I did take the time to make my bed. I love the feeling of contentment it brings. My day seems to start on a more calm—and ordered note—whenever I make my bed. And, I immediately feel productive. It even makes a stressful day seem a tad better when I come home to a bed that’s in order. Apparently making your bed every day doesn’t only bring contentment; it might actually make you happy. In The Happiness Project by Gretchen Rubin, she discusses the happiness benefits of making your bed every day. She even wrote about this idea again on her blog because she has gotten such great responses from people who find that their favorite “happiness project” is simply making the bed every day. The thing is, not everyone likes to fully make the bed. Personally, I all out make my bed with sheets tucked in, comforter pulled up and...
Mix-n-Match Your Way to Your Favorite Bedding
I have a thing for mixing old and new in my home. Take the bedroom. Layered on top of my 3-year-old Target comforter is an I-don’t-know-how-old handmade quilt. Vintage and modern. Something about the mix of the hand stitched quilt and the contemporary-patterned comforter just works for me. Pairing the modern comforter with the old world quilt creates an overall look that feels more texture-ized and comfy. It’s not as “flat” as either one of the pieces by themselves. And, even though the colors of the quilt and comforter don’t exactly “match”, they do work with each other. Like friends. Even in their distinct differentness, they’re both similar-hued and neither overpowers the other. So, what about you and your bed? You can use this same idea of mix-n-matching with your own bed. It doesn’t necessarily need to be a mixture of old and new. Just think about combining opposites. Pair a simple white duvet with a rich faux fur throw. Layer a plain yellow bedspread over polka dot sheets. Drape a ruffled throw over a smooth duvet. Anytime you look at the beds in magazines, they’re all decked out in blankets, shams, duvets and sheets in different textures, similar-style...
Home Decorating Resolutions For 2013
Happy New Year! I’m not always a fan of resolutions, but I love the idea of a fresh start that comes with the New Year. When decorating your home, it’s always nice to take a fresh look at your space. What better time than the New Year to do just that? Often, you can rework what you already have to create a whole new look in your living room, kill the blahs in your bedroom, and even love your less-than-perfect kitchen (I’m talking about you renters). You may even realize that your dream home is the one you’re in right now. This idea goes along with the tagline of Red Leaf Style: Reimagine. Repurpose. Relove. I haven’t really taken the time before to explain Reimagine. Repurpose. Relove. So, I’m going to now in the form of home decorating resolutions. These resolutions are for any of you who want your home to be a place you love. When you reimagine… …you find new ways to look at your current home. Reimagining opens up far more possibilities to be happy in your current home than if you just focus on your bedroom being too small or the fact that you can’t...
How to Wrap Gifts Without Buying Wrapping Paper
Buying new wrapping paper, bows, ribbon and tissue paper every Christmas can get expensive—and wasteful. With a little creative thinking and a bit of scavenging around the house, you can find everything you need to wrap gifts with recycled or reused materials. Here are some ideas that I used this year. Newspaper This versatile classic never gets old. Newspaper makes the perfect reuse wrapping paper. It even has the same fun ripping sound and sensation as traditional wrapping paper. And, you can even wrap the gift in the section of the newspaper that best fits the recipient. Funnies for the kiddos. Home and Garden for mom. Sports for dad. Style for sis. I’m being stereotypical here. Please be more creative than I am. Greenery Head out to the backyard and trim some pieces off that pine tree and whatever those other trees are called that are green all winter (Are they just evergreens?). Whatever they’re called, snip off a few boughs and incorporate them into your gift wrapping. A simple twig or two tucked into some ribbon or string will make a package look rustic. For the package above, I made a mini wreath out of snippets of greenery. The...
Do-It-Yourself Fabric Wreath
For some reason I don’t (well, didn’t) own a Christmas wreath. Too many moves in too few years, and too tight a hold on my wallet, are likely the causes. This year though, it was time for a wreath. My door looked all sad and lonely and “bah hum bug-y” without one. As you’ll see if you stick around here at Red Leaf Style, I’m kind of a crazy person about making my own décor. Or, at least finding it for cheap at secondhand shops and thrift stores. So, of course I wasn’t just going to buy a wreath. Gosh. I was going to make one. Preferably in the least expensive way possible. After a little thinking (Pinterest searching), I decided to make my own fabric wreath. (Copy this wreath.) It seemed relatively easy and didn’t require a lot of supplies. I assembled everything I needed through trips to secondhand stores. Budget Breakdown: Straw wreath form: $1, D.A.V. Green and red checkered fabric & red corduroy: $7, Re-Runs Vintage Apparel, Kansas City (I dug these pieces of fabric out of a huge box.) Green fabric (Was originally an Old Navy shirt.): $2.09, Goodwill Ribbon: $0.50, Goodwill Total: About $11 Could I just buy...
DIY Hanging Collage: Christmas Style
When I decorate for Christmas, I like to use items I already own and just Christmas-ify them. Take this hanging collage. This project actually started quite a while ago as a way to fill the empty wall space between two windows in my living room. I was having a hard time arranging the random bits of paper and other items on the collage in a look that I liked. Nothing was working. Luckily, Christmas time came along. So, everything else came down, and Christmas décor went up. I shuffled through drawers and photo boxes and ended up with quite the pile of sort-of-related-to-Christmas items to hang on the collage. Magazine clippings. A book. Last year’s Christmas cards. (I plan to replace these as new ones come in.) Random snowflake ornaments. A piece of felt. Overall, I think it works. This hanging collage couldn’t be easier to create. Even for the not so handy do-it-yourselfers out there. Here’s how. What you need: Picture hanging wire Nails Hammer Tape measure Small binder clips Cute items to hang Directions: Using a tape measure, determine how long you want your hanging collage to be. Also, decide how many rows you want. (I went...
Published In VintageKC Magazine!
Time to gush. I’ve had an article published in the winter issue of VintageKC magazine, and it all started right here on Red Leaf Style because of one blog post. The post featured a few photos and my experience at my friends’ barnyard vintage-inspired wedding. Through good ol’ Facebook, the editor of VintageKC saw my post and asked me to write an article about the wedding for the magazine! After months of waiting (the wedding was in July) the article has finally been published and is ready for you to read in all of its vintage-y goodness. Check it out here (page 24). Or, pick up a copy at select stores in the Kansas City, Missouri area. Related articles: Published in VintageKC Magazine: Winter 2014 Published in VintageKC Magazine: Fall 2014 Vintage Love: A Barnyard Wedding...
