

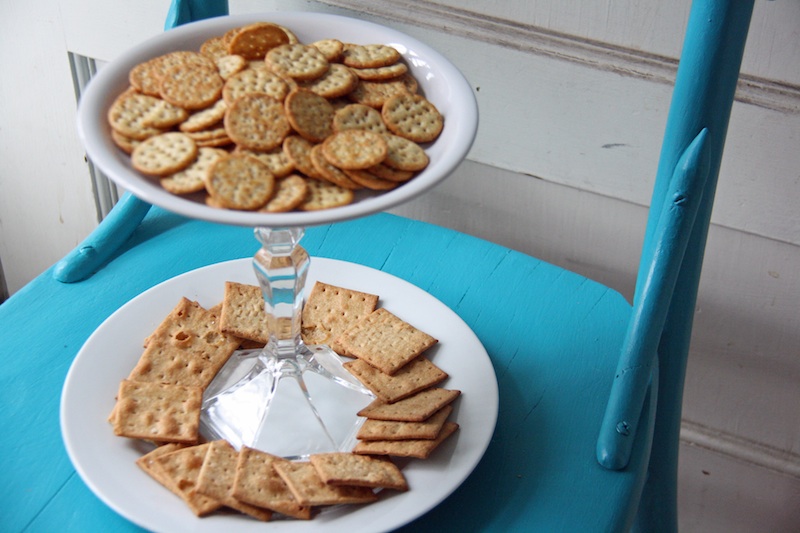
Displaying snacks on a tiered tray immediately transforms a bunch of ordinary crackers or cookies into something much more elegant. After years of working for a catering company, I know that how you present food affects how tasty it appears. Simple additions to how you place the food can make all the difference, like using a tiered tray.
Tiered trays create levels, which makes a display of food more interesting and fun. Unfortunately, plate stands or tiered trays can sometimes be pricey—but not for the do-it-yourselfer. Here’s how to make a tiered tray using just a couple of plates and a candlestick holder.
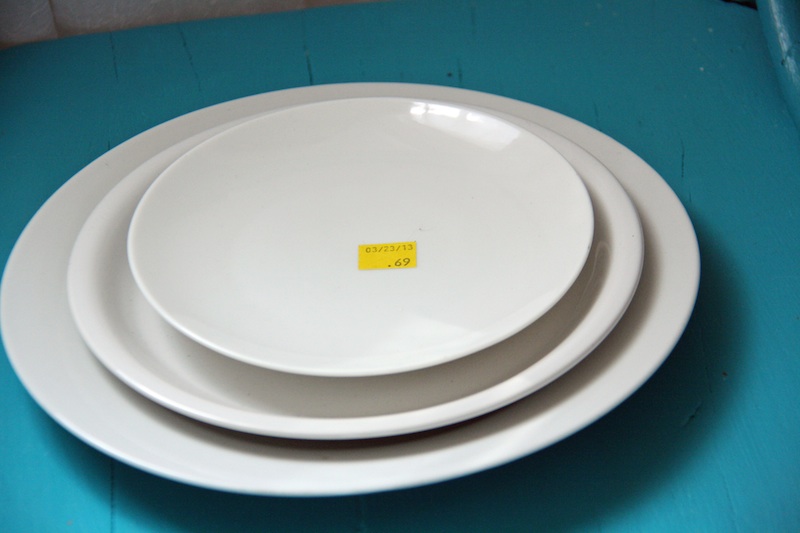
First, find a few plates in varying sizes. I was planning to make a three-level tray, so I found small, medium and large-sized plates at a local Goodwill. (I later decided to make a two-level tray because three levels seemed too tall.) Each plate was $0.69! Can’t beat that!
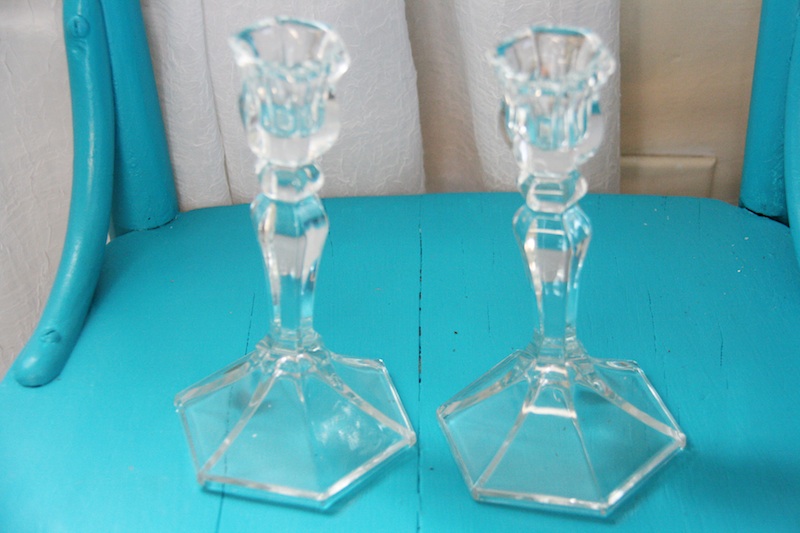
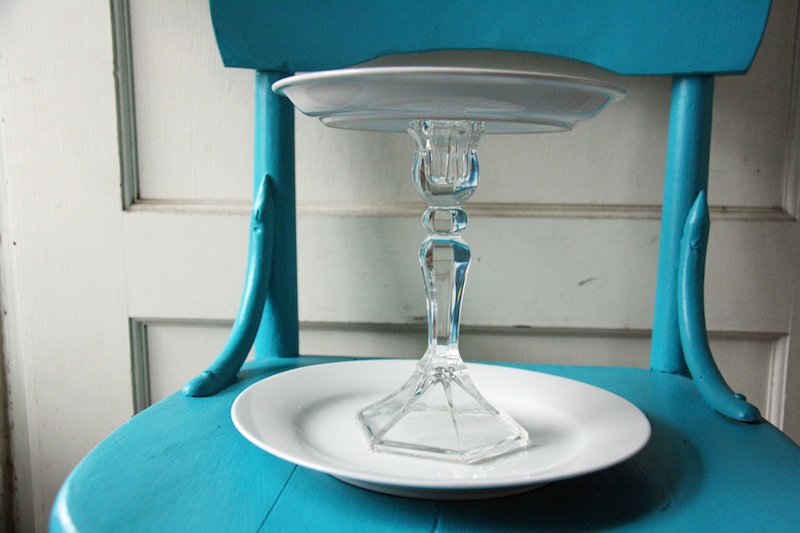
Then, find a candlestick holder. (Again, I had two candlestick holders because I was going to make three tiers, but decided against it.) Any candlestick holder will do. You can always paint it to get the look you want. A lot of blogs out there create this same project, but spray paint everything—plates, candlestick holders and all. Maybe it’s just me, but I don’t want to put food on spray painted plates. That’s why I loved the look of these glass candlestick holders with the white plates. I got my candlestick holders for free from my grandma (Thanks Mimi!)
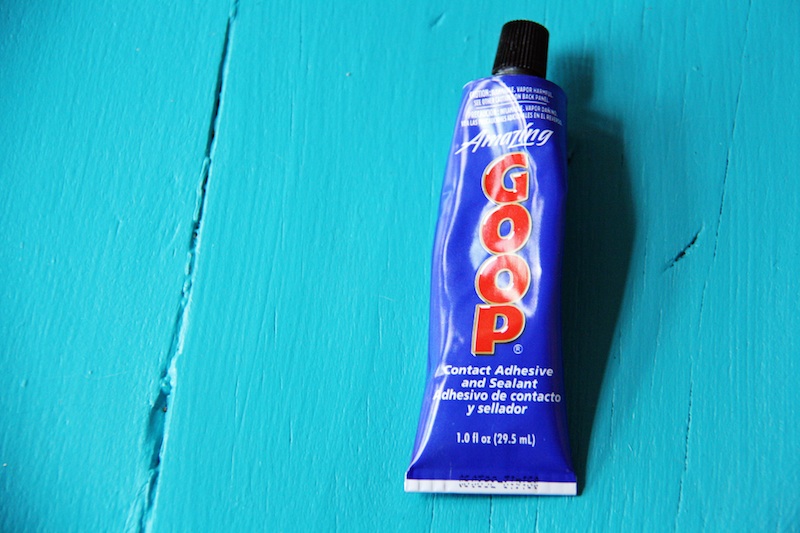
Next, spread a thin layer of glue over the bottom of your candlestick holder and adhere it to your big plate. I used Amazing Goop, which was $2.27 from JoAnn’s after a 40 percent off coupon. Then, spread a thin layer over the top of your candlestick holder and place your smaller plate on top of it. That’s it! It will take about 24 hours for the glue to fully seal.
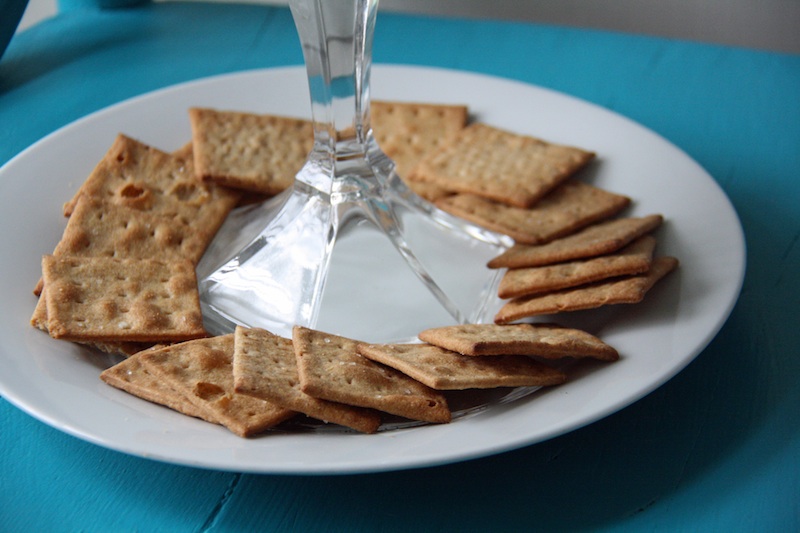
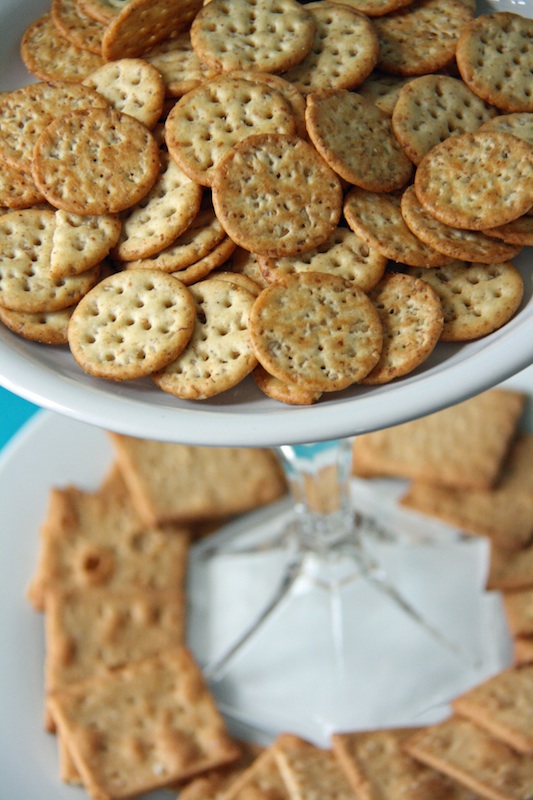
I couldn’t be happier with my tiered tray. It’s so pretty with such little effort, and the grand total? $4.34! (I’m missing tax on the plates, but you get the idea.) I can’t wait to break out this tiered tray the next time I host a get together or a party, or maybe I’ll use it just for fun by myself, because I think things like that are fun. Ha! Enjoy!
Keep Up With Red Leaf Style!
Follow Red Leaf Style author Kirsten Hudson on Twitter @kirsten_hudson, Google+ and Pinterest.
October 6, 2013
[…] 3. Easy Tiered Tray […]
October 6, 2013
[…] 3. Easy Tiered Tray […]
January 7, 2014
[…] scavenged from my yard look fancy displayed on a tiered tray. (P.S. I made this tiered tray for about […]
January 7, 2014
[…] scavenged from my yard look fancy displayed on a tiered tray. (P.S. I made this tiered tray for about […]
January 27, 2014
[…] scavenged from my yard look fancy displayed on a tiered tray. (P.S. I made this tiered tray for about […]
March 18, 2015
[…] full instructions, check out my original tiered tray stand, or watch this video where I explain how to make a tiered tray on Better Kansas City, a local […]